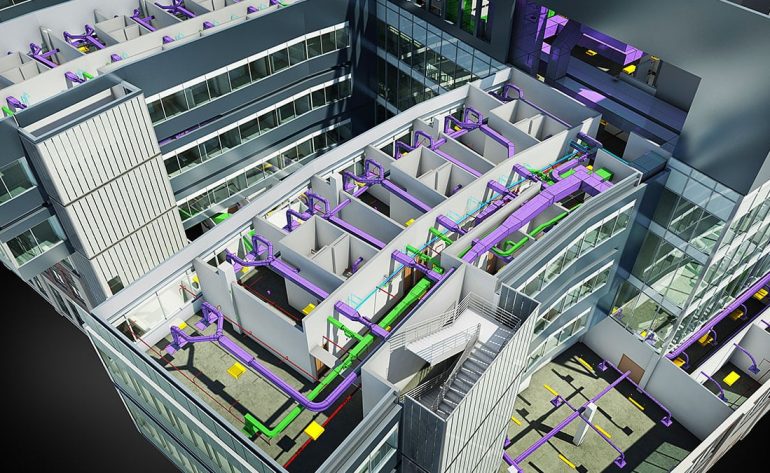
BIM with Revit Architecture

Revit Architecture is an integrated architectural design and documentation environment. Revit users create a virtual building model of design with intelligent building elements. These smart, parametric building elements are automatically adjusted and interact with the design environment, and at the same time Revit creating views such as floor plans, sections, elevations, schedules, and so on.  This program aims to enhance the participants productivity by giving them the ability to produce below course objectives.

Course Objectives

Learning Outcomes

Target Audience

Architects, Civil engineers, draughtsmen, Quantity surveyors and other relevant professionals such as land surveyors, Building contractors, exterior and interior designers.
Students who follow the civil related technical programs.  

Prerequisites

Fundamental knowledge about building construction process.

Course Structure

  • About Archi Tech CAD Academy
  • About Learning Management System and Results
  • Management System
  • About Students’ support system
  • Revit User Interface 
    • Home Screen and Concept of Project and families
    • Quick access toolbar and info center
    • Tabs, Panels, and Tools
    • File tab and Option menu
    • Setting up shortcuts, Display, tool Tip,and File Location
    • Default File types and File Location
    • Project Browser, Properties pallet, and Type selector
    • Start New Project with Architectural Project Template
  • Revit Culture
    • Activity 01 (Getting Familiar with Revit Interface)
    • Navigation Options (move, pan and rotate)
    • Working with View Cube
    • Shift between views
    • Revit Elements (Model, View, Datum, and View specific)
    • Hierarchy of Revit Elements
    • Save and backup options
  • Explain Formative 01 Assignment
  • About BIM and Autodesk Revit, Revit Essential Modification Tools
    •  About BIM and Autodesk Revit
      • What is BIM and What Is Autodesk Revit
      • What Is the Current Practice of CAD-Based Construction Projects?
      • What is the Practice of BIM Based Construction project?
      • Comparison of CAD and BIM workflow and compare advantage.
      • LOD and LOI (Introduction)
      • What is the Role of Revit in BIM Workflow
      • Benefits of Revit to the Sri Lankan Construction Projects and Companies
    • Revit Essential Modification Tools
      • Revit Object Selection Methods
      • Right Click Options
      • Move Copy and Their Options
      • Rotate Command
      • Align and Offset Tools
      • Mirror Pick axis and Draw axis
      • Linear and Radial array
      • Scale (Graphical and Numerical)
      • Split and Pin Elements and Their Use
      • Group and Ungroup Objects
      • Create Similar Tool and Match properties
      • Trim and extend to corner (single and multiple elements)
      • Using align Dimension
  • Levels and Grids, Wall Architecture
    • Levels and Grids
      • Create New Levels Modify Value and view name
      • Create new plan views
      • Browser organization options
      • Create Grids, Modify Distance and grid name
    • Wall Architecture
      • About Revit Architectural and structural walls
      • Create a 9” brick wall and modify the wall structure
      • Draw walls by using different location line
      • Using temporary dimensions
      • Create compound wall
      • Create wall by using Core face interior and exterior
      • Modify wall profile
      • Wall Joints
      • Wall Sweep and reveals
      • Types of Curtain walls
      • Create a curtain wall and change vertical and horizontal panels
      • Add mullions
      • Use of curtain wall in construction project
      • Wall Cladding and brick pattern by curtain walls
  • Structural Elements
  • Starting of BIM Project 01
    • Setting up Levels and Grids
  • Structural Foundation
    • Import structural Foundations and modify them
    • Place by using grid Intersection
    • Use Isolated foundation and pile foundation
  • Structural Columns
    • Difference between architectural and structural columns
    • Import structural column and modify
    • Place by using grid Intersection
  • Structural Beams/Framing
    • Import structural Framing and modify
    • Place by using on grid line
    • Change Geometric possessions (X, Y, Z Orientation of Beam)
  • RRM Foundation
    • Identify the ideology of Stacked wall
    • Create Sub walls
    • Create Stacked wall (Wall Foundation 01)
    • Create Shoe type Foundation
    • Place wall Foundation by changing Top and Bottom Constraints
  • Structural Slab and Paving
    • Create Floor and edit structure
    • Place Mass Concrete floor and Plinth paving
    • Place Slab concrete
  • Parts of the Staircase and Terms of Revit Stairs
  • Revit Staircase Types
  • Create Monolithic Stairs and Edit Run type (Riser and Tread)
  • Create Basic stair shapes
  • Create stair with Landing
  • Create L Shape and U shape Stairs
  • Crete “T” Shape Stair
  • Edit the landing Type and Shape of the landing
  • Match stair with finished landing
  • Move risers, add or remove risers
  • Create Assembled Stair and compare it with a monolithic stair
  • Steel stair (For warehouse)
  • Suspended Glass stair
  • Wooden stair with carriage support
  • Multi-story stairs
  • Customized stairs by sketching
  • About boundary line riser line and stair path
  • Create double-landing stairs
  • Create Fancy Stair (Own Design)
  • Advanced Railing
    • Identify the anatomy of the Railing
    • Create a new Railing type
    • Edit Intermediate rails
    • Edit Post and Balusters
    • Draw Railing on different locations
    • Assign host (add railing to the ramp, stairs walls)
    • Modify the Top rail and edit the start and extensions
    • Create guard wall for stairs
    • Create Hand Rail (fix in the wall)
    • Use railing and fencing from another project
    • Create a road barrier and set host to the top surface
    • Create continuous railing from stair and slab
  • Managing Views
    • Understanding the concept of View
    • Identify and modify the View Range
    • Situations need to use plan region and use plan region
    • Setting up the underlay
  • Suspended Ceiling
    • Understand about ceiling plans
    • Create Automatic and sketched ceiling
    • Change Ceiling Heights and create customized ceilings
  • Place a Components
    • Understanding the methodology of Component placement
    • Place Doors and windows
    • Place Furniture and other components
  • Material Browser
  • Project materials, Material library, and material editor
  • How to use BIM Resources from websites
  • Register and Download Paint Material Library
  • Add ADSKLIB file to Revit material library
  • Select paint and add to project materials
  • Change Identity data
  • Apply Paint ( as a paint) to the model
  • Paint application methods (Vertical and horizontal splits, Split face)
  • Create New materials /Duplicate materials and change identity data
  • Modify material graphics
  • PBR Materials/PBR Texturing
  • Download Free resources of PBR materials.
  • Create Customized Paving texture
  • Hatch Patterns (Drafting and Model Pattern)
  • Floor Finishers and Tile layout Plan
  • Insert Decals and Place decals
  • Setting up Levels
  • Model walls and Floors
  • Fix Doors and Windows
  • Interior and exterior arrangement
  • Model Roof
  • Insert Wall plate and Ridge Plate
  • Model Rafters and batons
  • Model roof facial and down pipes
  • Roof tile and ridge tile
  • Topo-Surface/ Insert Files
  • Insert Files
    • Import / Link AutoCAD File
  • Import Image and Pdf Files
    • Change Scales
    • Manage Links
  • Topo-surface
    • Understand Contours and topo surface
  • Develop Topo Surface by using CSV and AutoCAD Files
    • Develop Topo surface by using Spot elevations
    • Working with Building Pad
    • Mark Access Road Fence and Exterior elements
    • Survey point and Project base point
    • Mark boundary lines, Split and Merge regions
    • Graded Region
    • Site settings
    • Soil Cut and Fill Volume Calculation
    • Introduction of Family Interface
  • Revit Family Editor (Model in Place)
  • Introduction to Family Editor
  • Family Templates
  •  Introduction of Solid and Void Forms
    • Working with Reference Lines and Planes
    • Parametric Box Family
  • Kitchen Interior Design
    • Pantry cupboards and pantry top
    • Panel designs and Panel components
    • Place Component Families
    • Walls and Ceiling Decorations
    • Lighting
    • Office Room Interior
  • Parametric Family Creation
  • Parametric concept (Parametric Box Family)
  • Create Parametric Dinning Table family
    • Create Parametric Computer Table Family
    • Create Ref Planes
    • Create Dimension parameters and Solid Forms
    • Create Void Forms
    • Cut and Join Solid and Void Geometries
      • Add Material Parameters
    • Working with Profile families
    • Nested Families / Nesting of components
    • Add Text Parameters (student No)
    • Detail level and Visibility parameters
    • Add Formulars and fixed values
    • Model Computer lab for CAD Academy by using Parametric computer table family
  • About mass modeling environment
  • Create and work with a work plane
  • Model Organic shape building
  • Divide surface
  • Parametric pattern-based family
  • Create a façade family and apply a pattern-based family to the project
  • Create mass floors and convert them to architectural Floors
  • Create walls and Roofs
  • Create top surface and surroundings
  • Develop more conceptual designs
  • Box Type House – BIM Project 01
    • Model Structural Foundation and Columns
    • Model Plinth Beam
    • Model superstructure columns and beams
    • Model architectural walls
    • Insert doors and windows
    • Structural Floor and Floor Finishers
    • Stairs and Railings
    • Plinth Plaster Moldings Facade and Skirtings
    • Interior designs (Bedroom and Kitchen)
  • Roof by Footprint
  • Defines slope and manages slope
  • Hip Roof, Open Gable, Roof Slab, Butterfly Roof
  • Combination Roof, Mansard roof, Dutch Gable, and Gambrel Roof
  • Cone shaped, Polygon shaped Roofs
  • Dome Roof, Steel Framed Roof
  • Dome and Chimineas
  • Roof By extrusions
  • Working with Slope arrow
  • Create mass Roofing
  • Create Walls and Roof
  • Import and Modify Timber beams
  • Model Wall plate, Ridge plate, and valley plate
  • Modify edges and coping
  • Use Beam systems and model Rafters and Batons
  • Create Roof Tiles and Roofing Sheets by using the Family editor
  • Place roof Tiles
  • Create Ridge Tiles and place them
  • Model Sofit and barge boards
  • Model Valence Board and Roof Gutters
  • Place Downspout
  • Model rafter exposed ceiling
  • Create section and section callouts
  • Create a schedule for Timber Quantities
  • Additional settings
  • Line weight, Line patterns, and own line styles
  • Object Styles and override object styles
  • Visibility graphic override
  • View templates
  • Design options
  • Transfer Project parameters
  • Purge unused
  • Design Options (Propose 3 Different interior furniture arrangements)
  • Project phasing
  • Project and shared parameters
  • Create your parameters
  • Realtime Progress report update
  • Material/ manpower and resource management
  • Concrete casting, Billing, and Delay updates
  • Setting up Levels and grids
  • Setting up Material and component
  • Model Structural Foundation and Columns
  • Model Plinth Beam
  • Model superstructure columns and beams
  • Model architectural walls
  • Insert doors and windows
  • Structural Floor and Floor Finishers
  • Stairs and Railings
  • Plinth Plaster Moldings Facade and Skirtings
  • Interior designs (Bedroom and Kitchen)
  • Prepare Structural plans and 3d Views
  • Modify Structural setting and structural units
  • Structural rebar shape families and shape browser
  • Set Rebar Covers and Rebar Diameters for Each Structural Element
  • Model Rebar for Footing (Single net and double net)
  • Model rebar for Structural Columns ( 4Bar and 8 Bars)
  • Rebar Placement Plane and Rebar Orientation
  • Rebar Set
  • Create Lap and Crank bar
  • Insert Stirrups
  • Manage hook lengths and rebar lengths
  • Model rebar for Structural beams (4Bar and 6 Bars)
  • Create Lap and Crank bar
  • Insert Stirrups
  • Area reinforcement for Slab
  • T1, T2, B1, B2 and Hook types
  • Stair Reinforcement
  • How to model reinforcement for Pile foundation and Structural Retaining wall
  • Create your Own Sheet Set (Title Block)
  • Finalized Plan Views
  • Annotation and Tags
  • Scale and place site plan
  • Project North, Street line, and rear spacing
  • Create Site setting out plan
  • Foundation Layout plan
  • 1st floor,2nd Floor Structural Layout Plan
  • Foundation Detail plan
  • Slab Reinforcement Detail Plan
  • Ground Floor Annotation
  • Ground Floor Tile Layout Plan
  • Ground Floor Room Legend
  • Building Section Drawing
  • Building Elevations
  • Create View Templates
  • Create Soakage pit, Wastewater system and Typical Drawings
  • Opening Schedule
  • IFC Drawings for Door windows
  • Roof Layout and Section Callout plans
  • 2D Detailing Part 3 – (BIM Project 02)
    • Drawing Sheet up / Set crop region and view types
    • 3D Annotation
    • Sun Setting and Shadow Study
    • Interior Design Proposal For Bed Room
    • 3D structural and Staircase detailing
    • Set up Drawing set and Sheet list
    • Issue Revision and Revision table
  • Work Sharing and Collaboration
    • Work sharing through BIM 360
      BIM 360 Sign in and manage BIM 360
      Create Work set and manage work set
      Link Revit File and manage Link
      Monitor and copy Levels
      Create plan views for MEP Modeling
  • Revit scheduling
  • Quantity takeoff and Material takeoff
  • Door window quantity takeoff
  • About Fields, Sorting and grouping and Formatting tabs
  • Foundation Material takeoff
  • Structural Column Material takeoff
  • Structural Beam material takeoff
  • Wall Material takeoff
  • Brick / Block material takeoff
  • Internal and External Plaster material takeoff
  • Wall Tile and waterproofing material takeoff
  • Paint material takeoff
  • Floor Concrete, Floor Finisher and skirting material takeoff
  • Door Window Reveal takeoff
  • Reinforcement quantity and weight takeoff
  • Roof Timber material takeoff
  • Project Concrete work Update
  • Method Statements and Specification
  • Starting date End date and Cumulative Progress update
  • Delay and Delay tracking
  • Billing details and Billing Update
  • Manpower and Machinery (Resource Update)
  • Sub Contractors and vendors work progress
  • Visualization and Documentation of 4D Data
  • Setting up a camera
  • Setting up view and view template
  • Graphic display option
  • Rendering settings
  • Set up a walkthrough
  • Video Rendering
  • Revit To Lumion Live Sync
  • Export and open through Lumion
  • Environment and texturing
  • Camera settings
  • Effect Files and Using effects
  • Image Rendering and Video Rendering
  • Final Assignment Brief
  • Summarize and Student Feedback

Payment Plan

RI 1601 Batch

$199/Per Student
  • Online Class (Zoom)
  • Commence on 28th Friday - June 2024
  • Classes on Friday at 7.00 PM - 10.00 PM
  • Duration - 3 Months (100 Theory Hours)
Course Details

Register Now

    reserve your seat

    How to join the courses?

    You can simply join our courses via filling our registration forms providing via Website, Emails & Facebook Marketing Campaigns.

    Do you provide software?

    Yes. We provide the virus-FREE & secure download links of the software. If you need further assistance to install the software, We are ready to help you via video tutorials and via remotely log in to your PC (using AnyDesk or TeamViwer).

    Do you provide technical help?

    Yes, Actually. Our IT Department is always with you for any kind of technical problems you face.

    How are the payment plans going?

    You can pay via our website & online transfers. As well as you can pay your course fee via installments.